
What is a Fauxdori and why should you have one? A Fauxdori is a DIY knock off of the popular Midori travel notebook. What is a Midori Travel Notebook? It is a leather-bound journaling system. Small, individual components, can be mixed, matched and added inside a sturdy leather cover by a system of elastic bands. It is completely customizable so that it matches your individual style. You can learn more and buy one here.
So what is a FAUXdori? That is a DIY version. Why DIY? Many reasons. Some people like the challenge of making things themselves (that would be me). Other people find the costs prohibitive. Still others find that the extensive array of accessories still doesn’t quite have what they want. I know several vegans who balk at the leather cover. There are many reasons to make one yourself.
This isn’t a tutorial on how to make them; there are plenty of really good ones out there, and I would just be reinventing the wheel. I will put links to some tutorials below.
So why should you have one? If you like to travel (or have a reasonably organized life) the Fauxdori is a great help. I tend to use mine more when traveling than everyday living, but I know at least one person who keeps their life in order with one. Some of my tricks for successful traveling are excel checklists, a 3 ring binder with hard copies of destinations (I should blog those too, sometime; they make all the difference in the world!) and my first Fauxdori.
I wore this one out, and used up all my signatures, so a made a new one out of leather, and new signatures, with neat folders, and pockets and all sorts of other fun things I found on Pocket Full of Vintage. These things are invaluable. Since you can refill the signatures, you can journal in them daily, then replace the signatures when they are full.
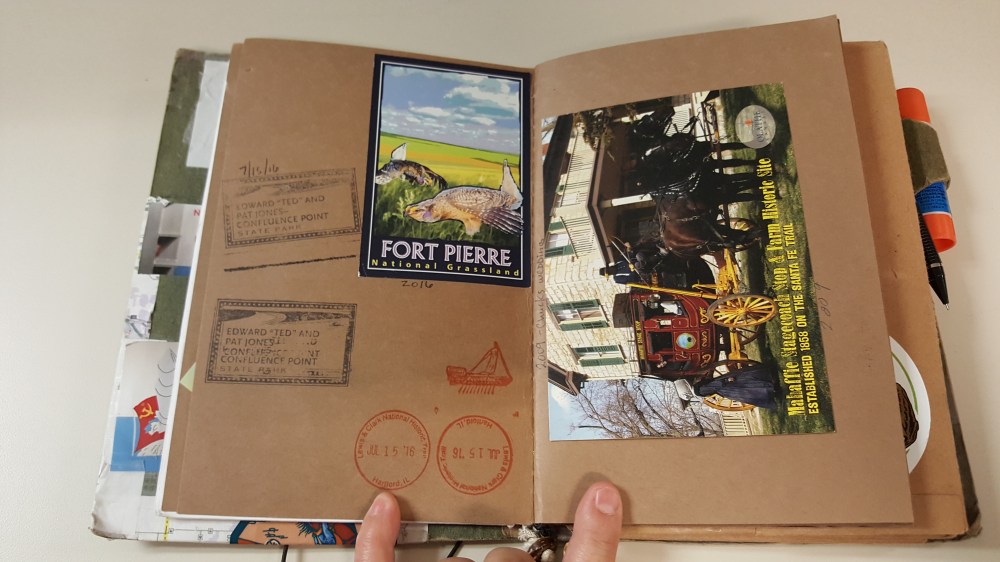
When traveling, I keep hard copies of legal papers in there, passports, reservations, and google map print outs. I also keep a pen, address labels for post cards, stamps, and stickers in it.
Part of my relaxation ritual before bed when I travel is that I make a point to sit down, put address labels and stamps on the post cards I have bought during the day, and write them out to my post card club. It helps me relax, and helps me write a coherent post while it is still fresh. It is also my way of sharing my travels and letting know that I’m thinking of people. As we have become increasingly physically disconnected in a digital world, getting a snail mail post card can make someone’s day. It is important to try to be a positive element in the world. This is one small way I do that.
I put stickers or draw pictures on the post cards and either walk to post them that evening or when I wake up the next morning. Unless I happen to be in the middle of nowhere, and then I post them as soon as possible. I try very hard to get the post mark from wherever I am, and I make an effort to take the road less traveled.

Folder with post cards, stickers, stamps and address labels.
It has folders to keep receipts in. That has saved us more than once!! One of our accounts was locked on a trip because the account number had been hijacked. We had all of our receipts for the entire trip in chronological order so the dispute lasted about an hour and a half. It makes matching it up to your financial institution a snap.
One of the other things I use my Fauxdori for is as a supplement to my National Parks Passport. There are a lot of non-federal parks and institutions that have stamps, and stickers. I made a book of craft cardstock for the sole purpose of stamps, stickers, receipts and other mementos.

Stamps, stickers, and ticket stubs for places I have visited.
I also keep a map of where I have been in the United States in the last 10 years. The whole family has a color code. My color is blue. The obverse side is a map with the color coding for the whole family on it since we don’t always travel together.

All of the states I have been to in the last 10 years.
When I made my Fauxdori, it cost me around $6 to make. All I had to buy was rubber bands and stickers. I literally had everything else on hand. We had just scanned all of our hard copies onto our cloud and had a small army of office supplies hanging out.
My cover was made from two hanging file folders that I used spray adhesive to stick together. I covered it with old road maps from before the days of GPS (remember when you had to actually navigate?!?). The folders were made from file folders, and the books I made myself with paper and card stock already on hand. I used my Crop-o-Dile to make the holes for the elastic cord
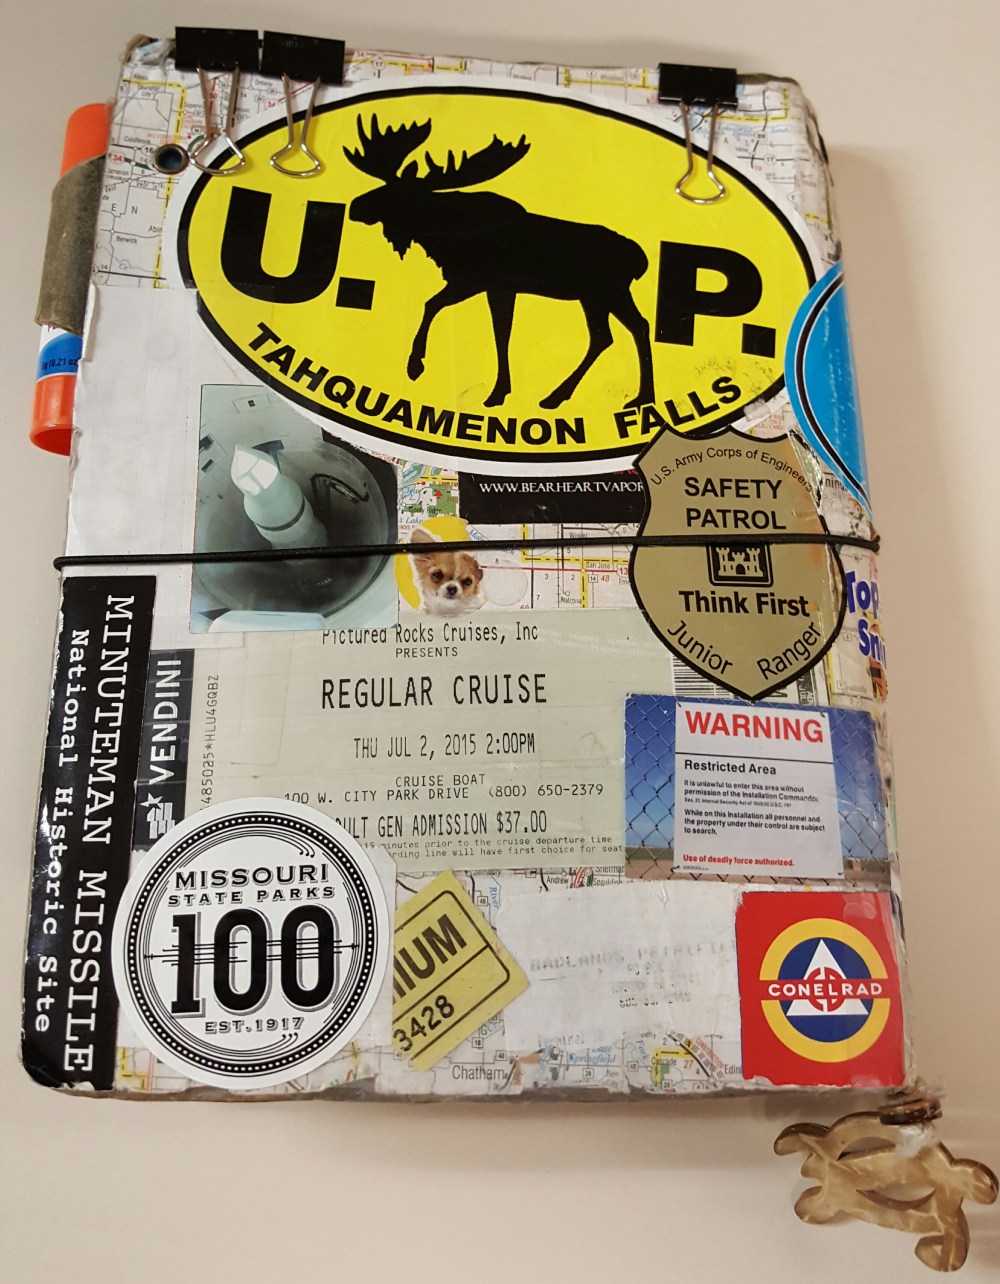
I have changed it a lot since I first made it. I slimmed it down considerably, and figured out what worked for me. One of the big changes I made was that I started putting stickers, and ticket stubs on the cover. It has become a visual reminder of all the places I have been.
My husband bought me the turtle charm from Pier 99 when we had lunch after touring the USS Lexington in Corpus Christi Texas. It was at the register when he paid. Every time I see it I remember that day, and walking up to the Lexington looking at the hermit crabs in the water.
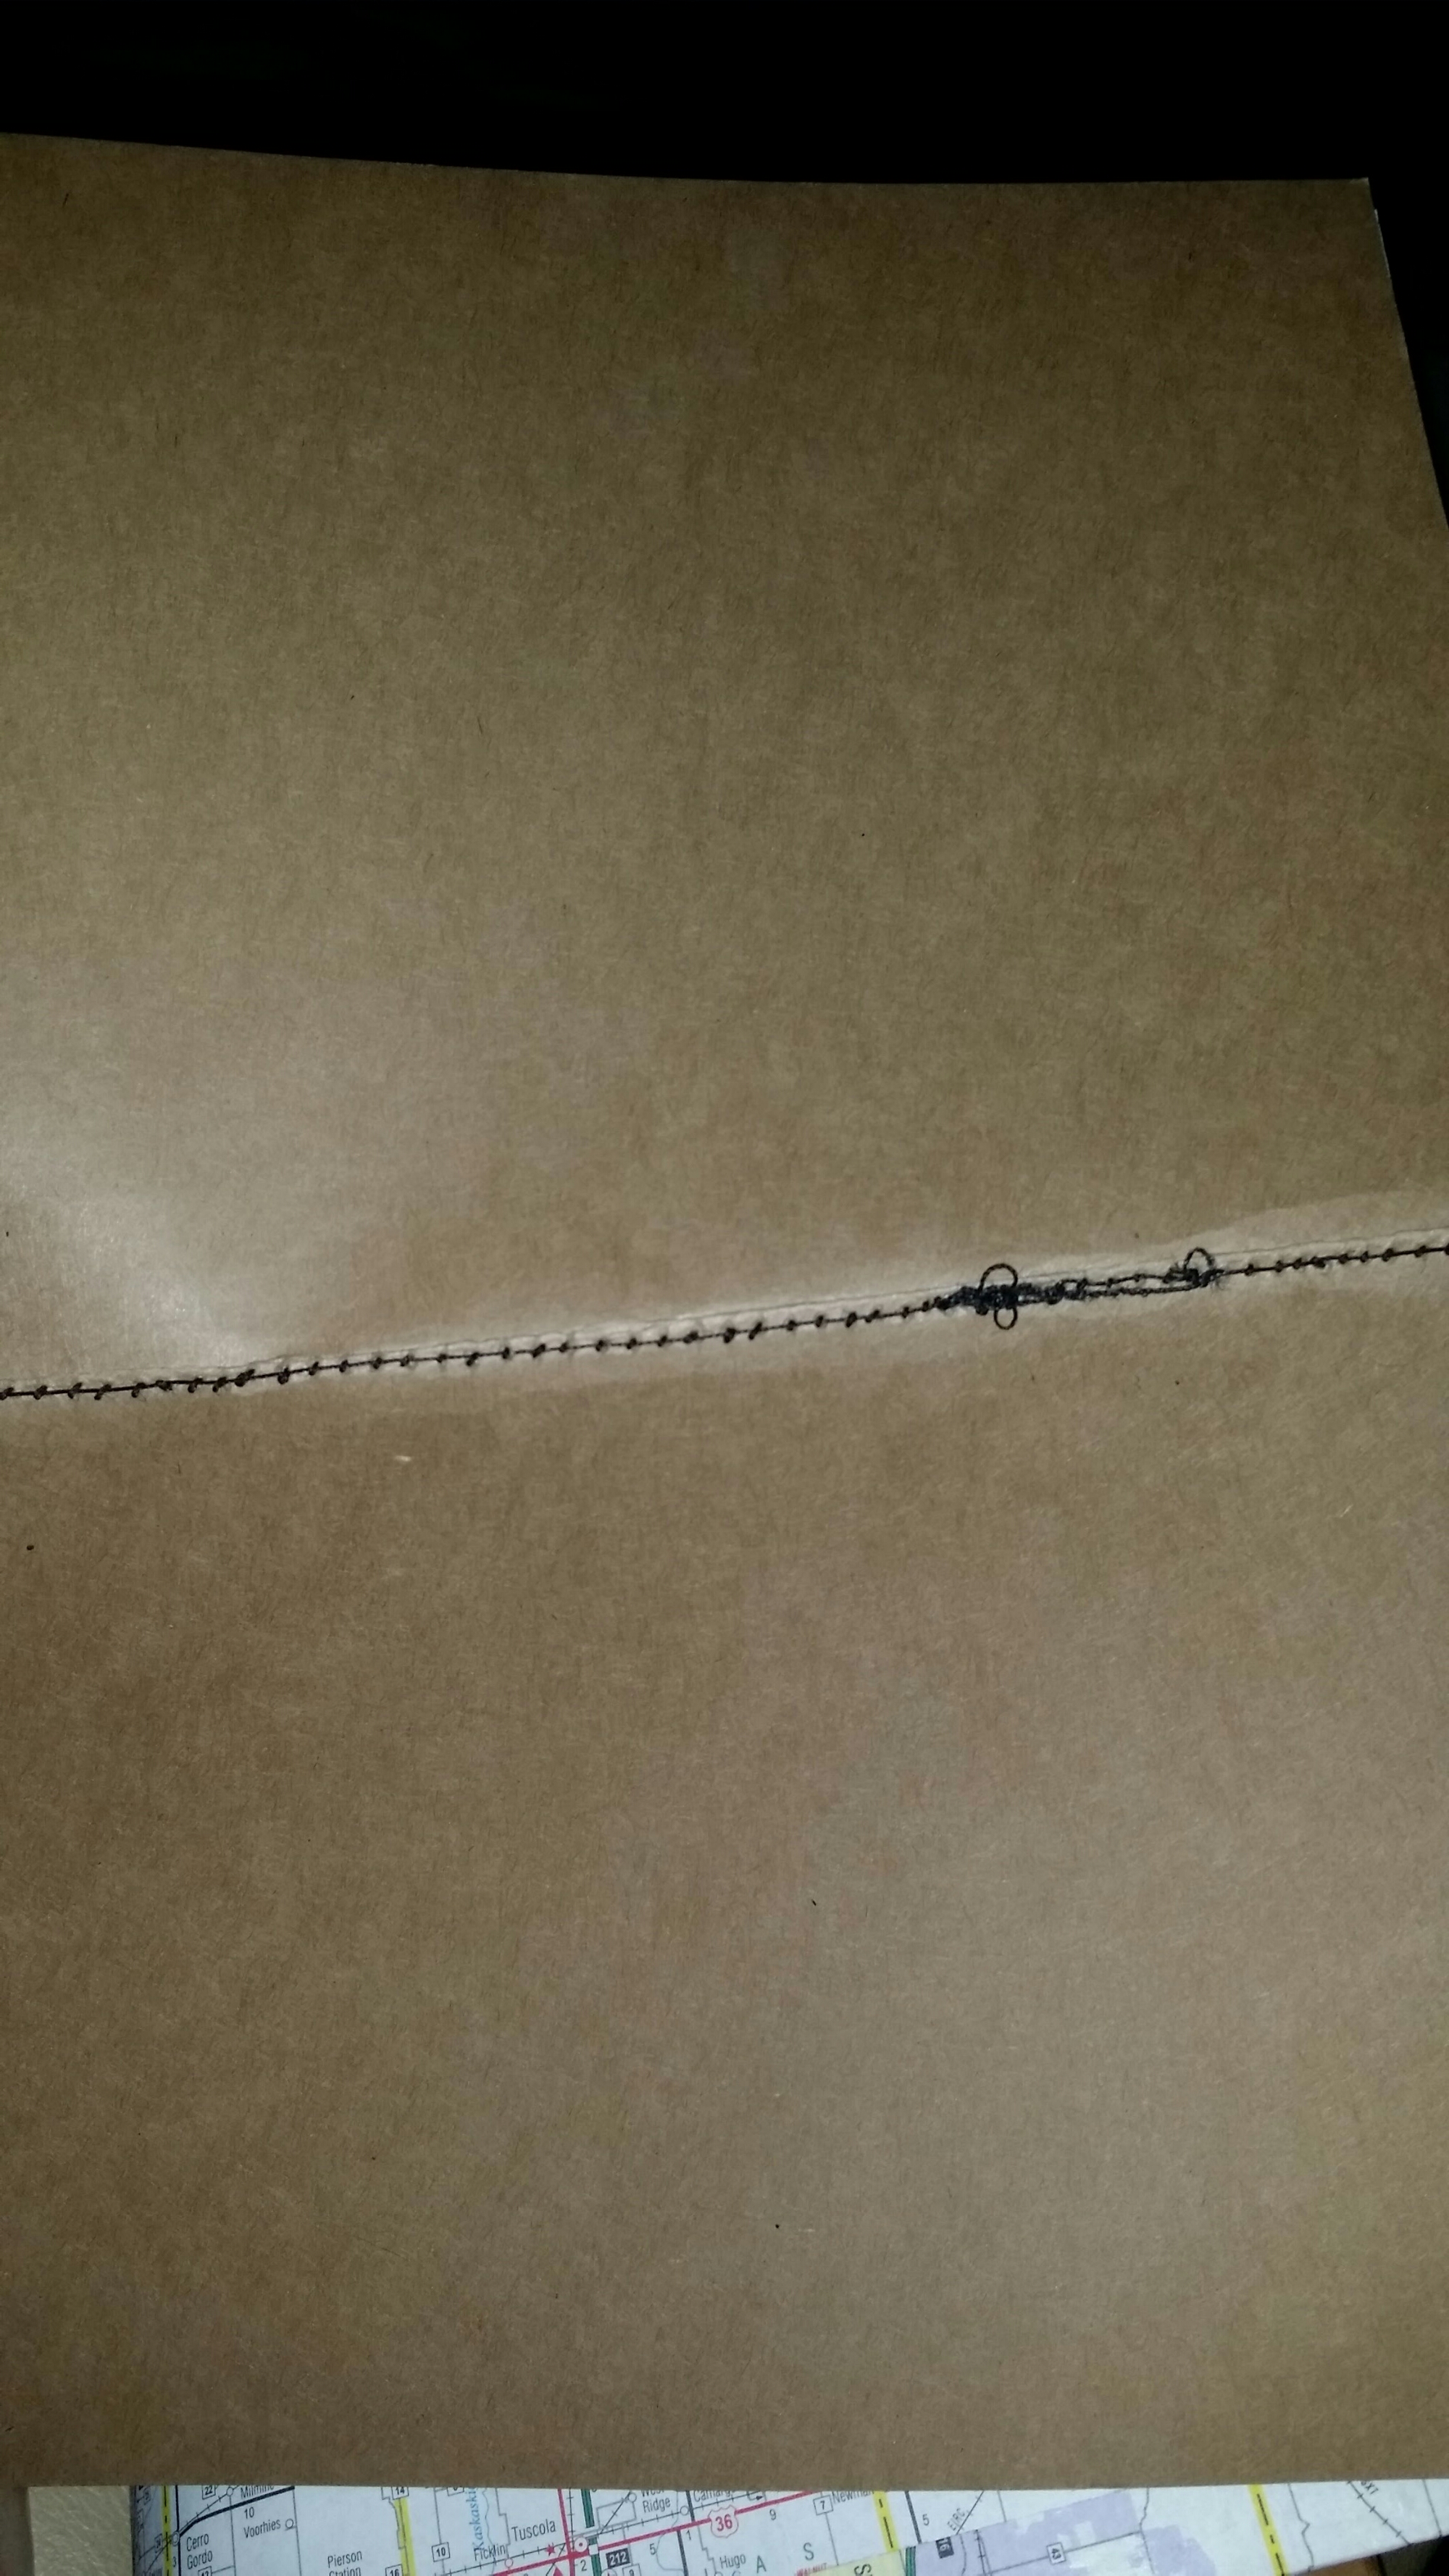
I know I said this wasn’t a tutorial, but regular printer paper and card stock make excellent books. Take 10 sheets at a time and a sheet of card stock, fold it to make a crease, then use your sewing machine (yes, you read that right) to stitch it together. It will wreak havoc on your tension and the needle is pretty much useless after making 4 or 5 of them, but it is super quick and easy! Here are a few photos of the ones I made.
The inside of the sketchbook. Made with a sewing machine.
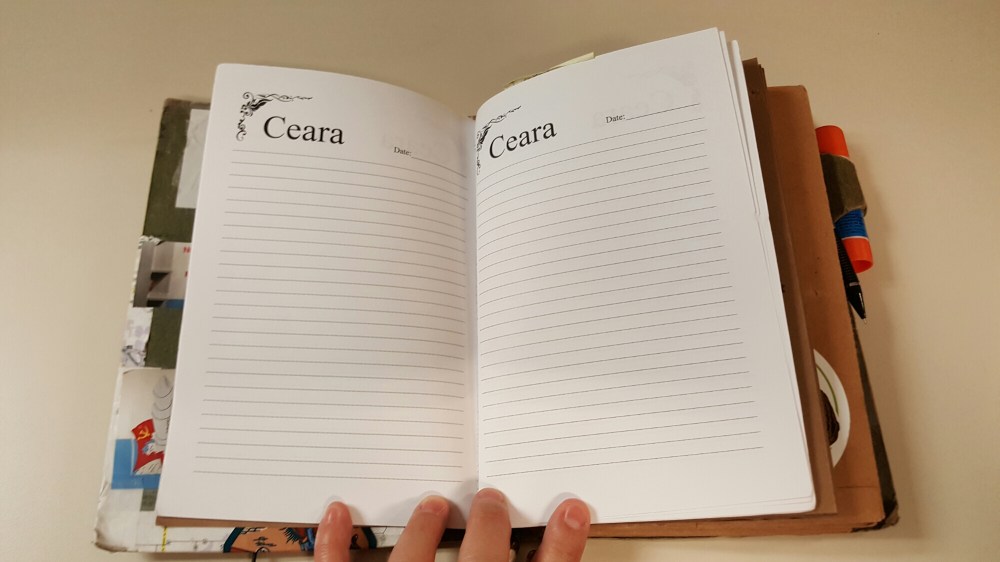
Also, if you can use Microsoft Word, you can make your own personalized journal pages. If you are word savvy, flip the orientation to horizontal, and make it two columns. Then find a clip art border for the upper left hand corner. Use word art to put your name on it. Tab over a few places to put the date field, and use the underscore about 15 times. Enter to the next line and just underscore the hell out of it until you get to the bottom. Copy that column, and past it in the second column. Bam. Print 10 of those, flip them in the printer to print 10 more on the other side and you have a book.
You and I both know that it will be a nightmare until you figure out how to put the paper back in to print correctly, I’m not going to pretend it isn’t. I believe in you. You will get it!!
I made one for my daughter with various types of drawing a sketch papers. Once you get the idea of how easy they are to make, you can do anything. I am actually working on some for a friend’s daughters that are coloring pages I pulled off the internet. I dropped them into a word doc with two columns so it is a lap sized coloring book. Yes yes yes, you can BUY all of the things I am describing, but where is the fun in that!?!?!?
In the years since I made mine, it has been all over the United States, and Canada. It has become a record of my travels and the things I have seen. If you are looking for a fun project I strongly urge you to make one of these for yourself. There are so many creative things you can make for them and so many ways to use them. If you travel a lot, they make excellent journals to document your trips. I made one for my mother in law who doesn’t travel all that much, but she does enjoy journaling.
I hope you choose to make one. As promised, here are the how-to links!
http://www.soobsessedwith.com/2015/04/guide-to-faux-doris-inserts.html
There are also a ton of YouTube videos that show how to make nifty little folders, envelopes, and other fun stuff. This lady over at Pocket Full of Vintage is AWESOME!!
https://www.youtube.com/c/Poketfullofvintage

